
How to Photograph Comet with DWARF IIUpdated a month ago
This tutorial is created by John Mozdzierz, and below is the image John took with DWARF II. To capture images of a Deep Sky Object (DSO) comet with Dwarf II telescope, follow this structured guide!

Step 1: Deep Sky Object (DSO) Location
1. Download any astronomy application or program. These are only examples. There are many to choose from. Just make sure they can locate Comets.
- https://stellarium.org
- https://skysafariastronomy.com
- https://telescopius.com/?utm_source=pwa
- Google Play Store or Apple App Store
2. Make sure your GPS location is active and correct on your device.
3. Open your astronomy app. Search for the DSO comet you want to view.
4. Note the location. Right Ascension (RA) and Declination (Dec). You will need it later.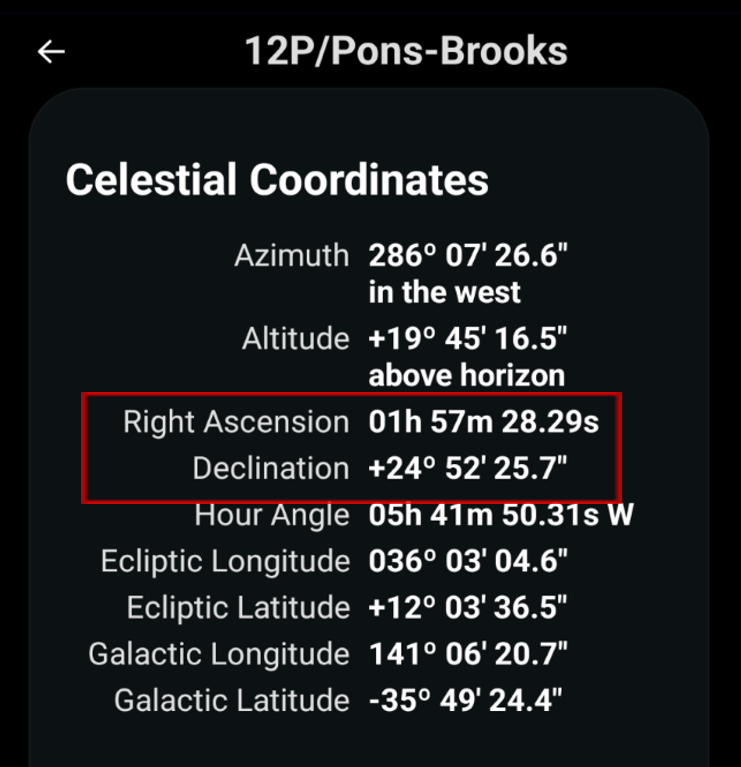
Step 2: Dwarf II Set Up
5. Always acclimate the Dwarf II outside for at least 20 minutes to avoid fogging, including any filters your planning to use.
6. Make sure the Dwarf II SD card has enough space for collecting images, clear if needed.
7. Rotate the lens all the way down and cover Dwarf II with its bag, a cardboard box, or towel. As long as it is dark.
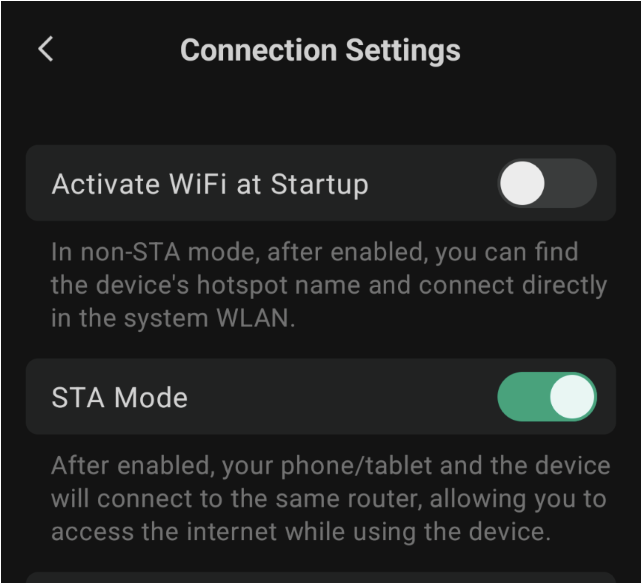
8. Connect to the telescope for shooting your darks.
- Direct connect via the Dwarf WiFi or the STA mode which is connected to your router.
- Once connected, shoot your Dwarf enabled darks for live stacking. This will take 20 minutes which if perfect to do while acclimating your Dwarf.
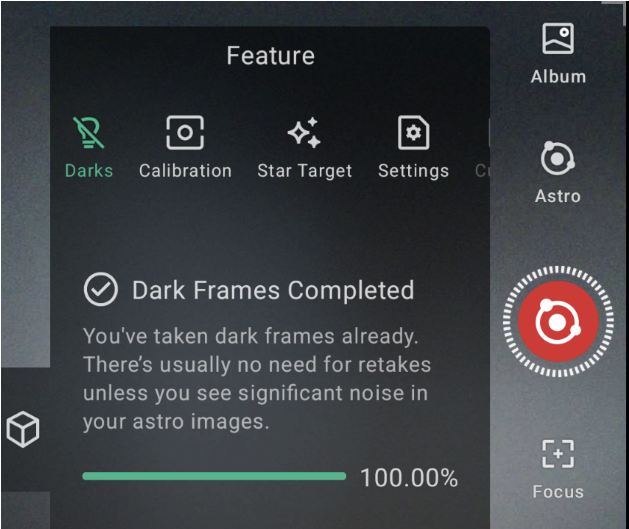
- After shooting these darks, you can then shoot your actual post processing darks. An average of 50+ should work fine. Remember to keep your settings for Shutter and Gain the same as what you are planning to shoot this night. (15 seconds shutter and 80 gain)
9. Next, you can decide to shoot with the Dwarf II in its normal upright position or in Polar alignment position.
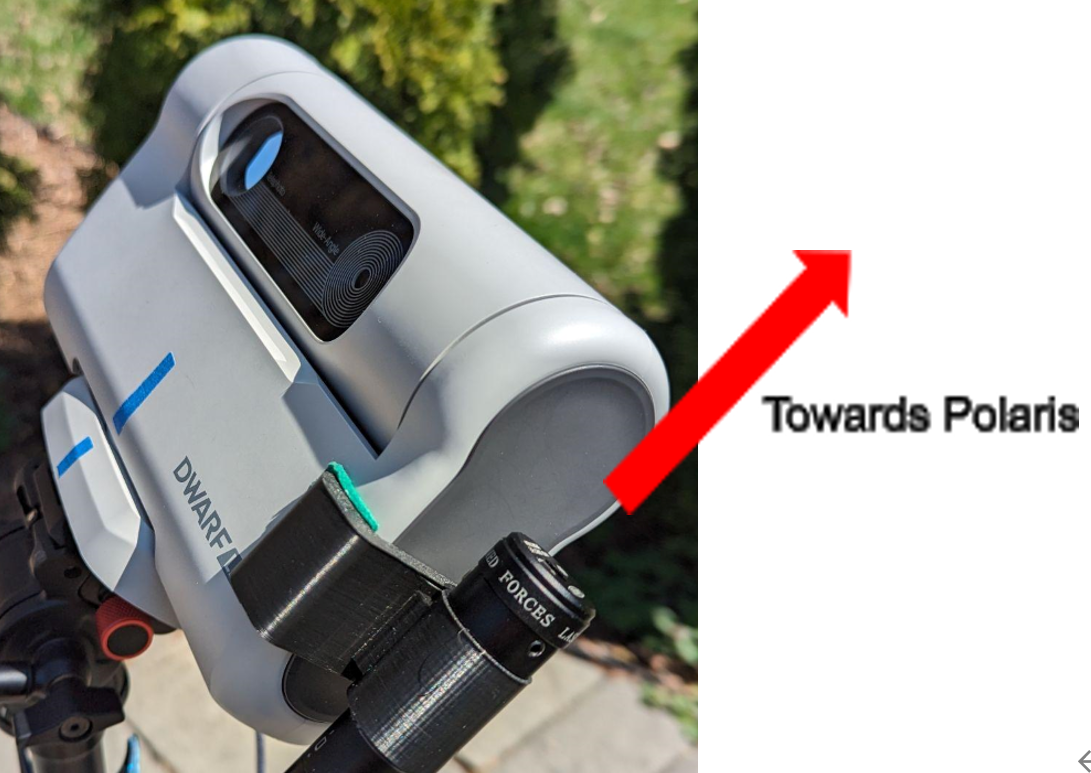
- For Polar alignment you will need to locate the Northern or Southern Polaris Star.
- Use either a site tube or a laser light attached to the flat side of your Dwarf II.
- With the Dwarf on a sturdy tripod mount, you will tilt the telescope with the logo up and the notch and battery compartment down, adjusting the angle and rotation to align your tube or laser to center on the Polaris star, while making sure the telescope base and the telescope itself stay aligned with the notch. Lock everything in place once aligned.
- Adjust the lens up from its previous dark position to where it just appears above the rim and pointing towards a clear view of the sky with stars.
- You are now ready for shooting your DSO Comet.
Step 3: DSO Comet Time
10. Select Astro Mode, select Focus and Auto Focus.
- You can also manually focus using a Bahtinov Mask filter.
- Make sure the field of view is clear and full of stars.
11. Now select Calibration and calibrate the Dwarf to establish its location.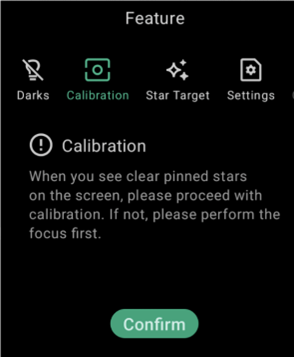
12. Select Feature. Choose the quantity (1-999), type (Fits), and quality (4k) of the images you want to shoot. A good start is 75-100 qty., Raw, and 4K.

13. Set the exposure to 15 seconds, the Gain to 80, and the Infra Red (IR) to cut.
14. Select Target. Go to Manual and input the RA and Dec from earlier for the DSO Comet. Make sure to confirm everything. It will then go to that location.
15. Press the red shutter button (shooting button) and begin shooting, sit back and enjoy.
16. Remember even though the comet is moving in real time, it is far enough away to be treated like any other DSO object.
17. Choose a stacking program and a post processing program to make your final image look spectacular! Here are just a few.